商铺名称:专业数控切割机厂家-武汉华宇诚数控
联系人:华先生(男)
联系手机:
固定电话:
企业邮箱:info@6618cnc.com
联系地址:武汉市江夏区庙山阳光大道特1号
邮编:武汉市江夏区庙山阳光大道特1号
联系我时,请说是在机床母机网上看到的,谢谢!
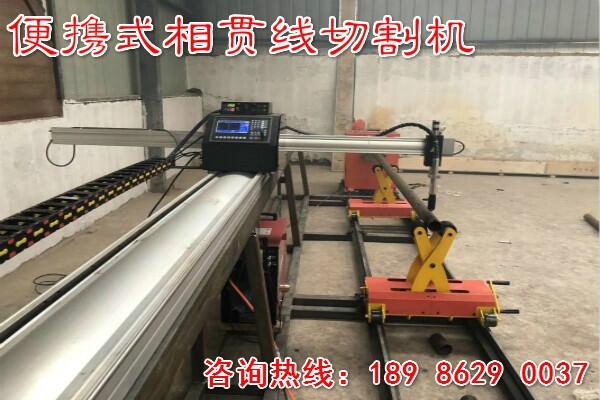
便携式相贯线切割机-便携式数控相贯线切割机厂家/价格/报价

咨询热线:189 8629 0037
一、设备简介:
1、管板机便携横向有效切割宽度1.6米,有效切割长度3米(长度可加长),可管板两用,实用性强,性价比高;
2、上海交大板管一体数控系统F2300BX,10.4寸液晶屏;
3、配国产专家版的套料软件,带共边、桥接功能;
4、可增配弧压自动调高和等离子电源,实现火焰和等离子两用。
5、相贯线火焰穿孔切割碳钢5-40mm;
6、等离子切割厚度视等离子电源而定;
7、电源选用国产知名品牌或美国海宝电源,暂载率100%,可以长时间持续工作;电源的价格差距很大,电源的质量直接影响到切割效果;
二、相贯线切割参数:
1、可切割钢管管径30-300mm;
2、有效切割管长3m,可以加长;
3、等离子配弧压自动调高 ;
4、卡盘箱配伺服驱动;平稳性更好;
5、可选配两轴不带坡口圆管套料软件:功能强大、使用简便,适用于做管桁架或流体管加工使用。


三、选型参考:
数控切割机选型步骤,用户需从切割幅面大小、结构形式、切割方式、调高方式等几个方面来综合考虑。
1、幅面大小 :确定板材需要切割的有效长度和有效宽度,以及大致的厚度范围;
2、结构开工:设备的结构形式有便携式式、龙门式、台式、管板一体机四种。
便携式式结构简单,设备移动和安装方便,不需占用固定的厂房,设备成本低。但受其结构的限制,横向切割宽度有限,高速切割时刚性较差。龙门式切割机,由于是龙门式支撑方式,所以设备刚性好,可以实现横向3-8m的大跨度。设备安装要求高,需占用专门的厂房面积,特点是长期使用稳定性好。
台式切割机为一整体式结构,移动就位方便,但切割幅面大小受到一定的限制。
管板一体机可实现平板与管子二合一的切割功能,一机多用,实用性强,相对于分别配置平板机和相贯线机来说,投入成本低,性价比极好。
3、切割方式 :切割方式可以从不同的角度来进行分类,
火焰切割、等离子切割、火焰与等离子两用切割机;
等离子分干式等离子切割、水下等离子切割;
数控与直条两用切割机;
数控相贯线与平板一体切割机。
(1)、火焰与等离子切割
火焰切割:是一种传统的热切割方式,适用于对中厚碳钢板进行高品质的下料切割。
等离子切割:适用于对碳钢板、不锈钢板、有色金属进行切割,切割速度比火焰更快。
(2)、相贯线切割
为满足用户进行圆管的相贯线切割,我们有两种不同的方式:一种是专用相贯线切割机;一种是相贯线切割专用部件,可将其配置到龙门数控切割机上,来完成相贯线切割。
前者适用于大批量专业相贯线切割,后者适合于当批量不大时实现一机多用,以便减少设备投入和场地占用。
切割模型
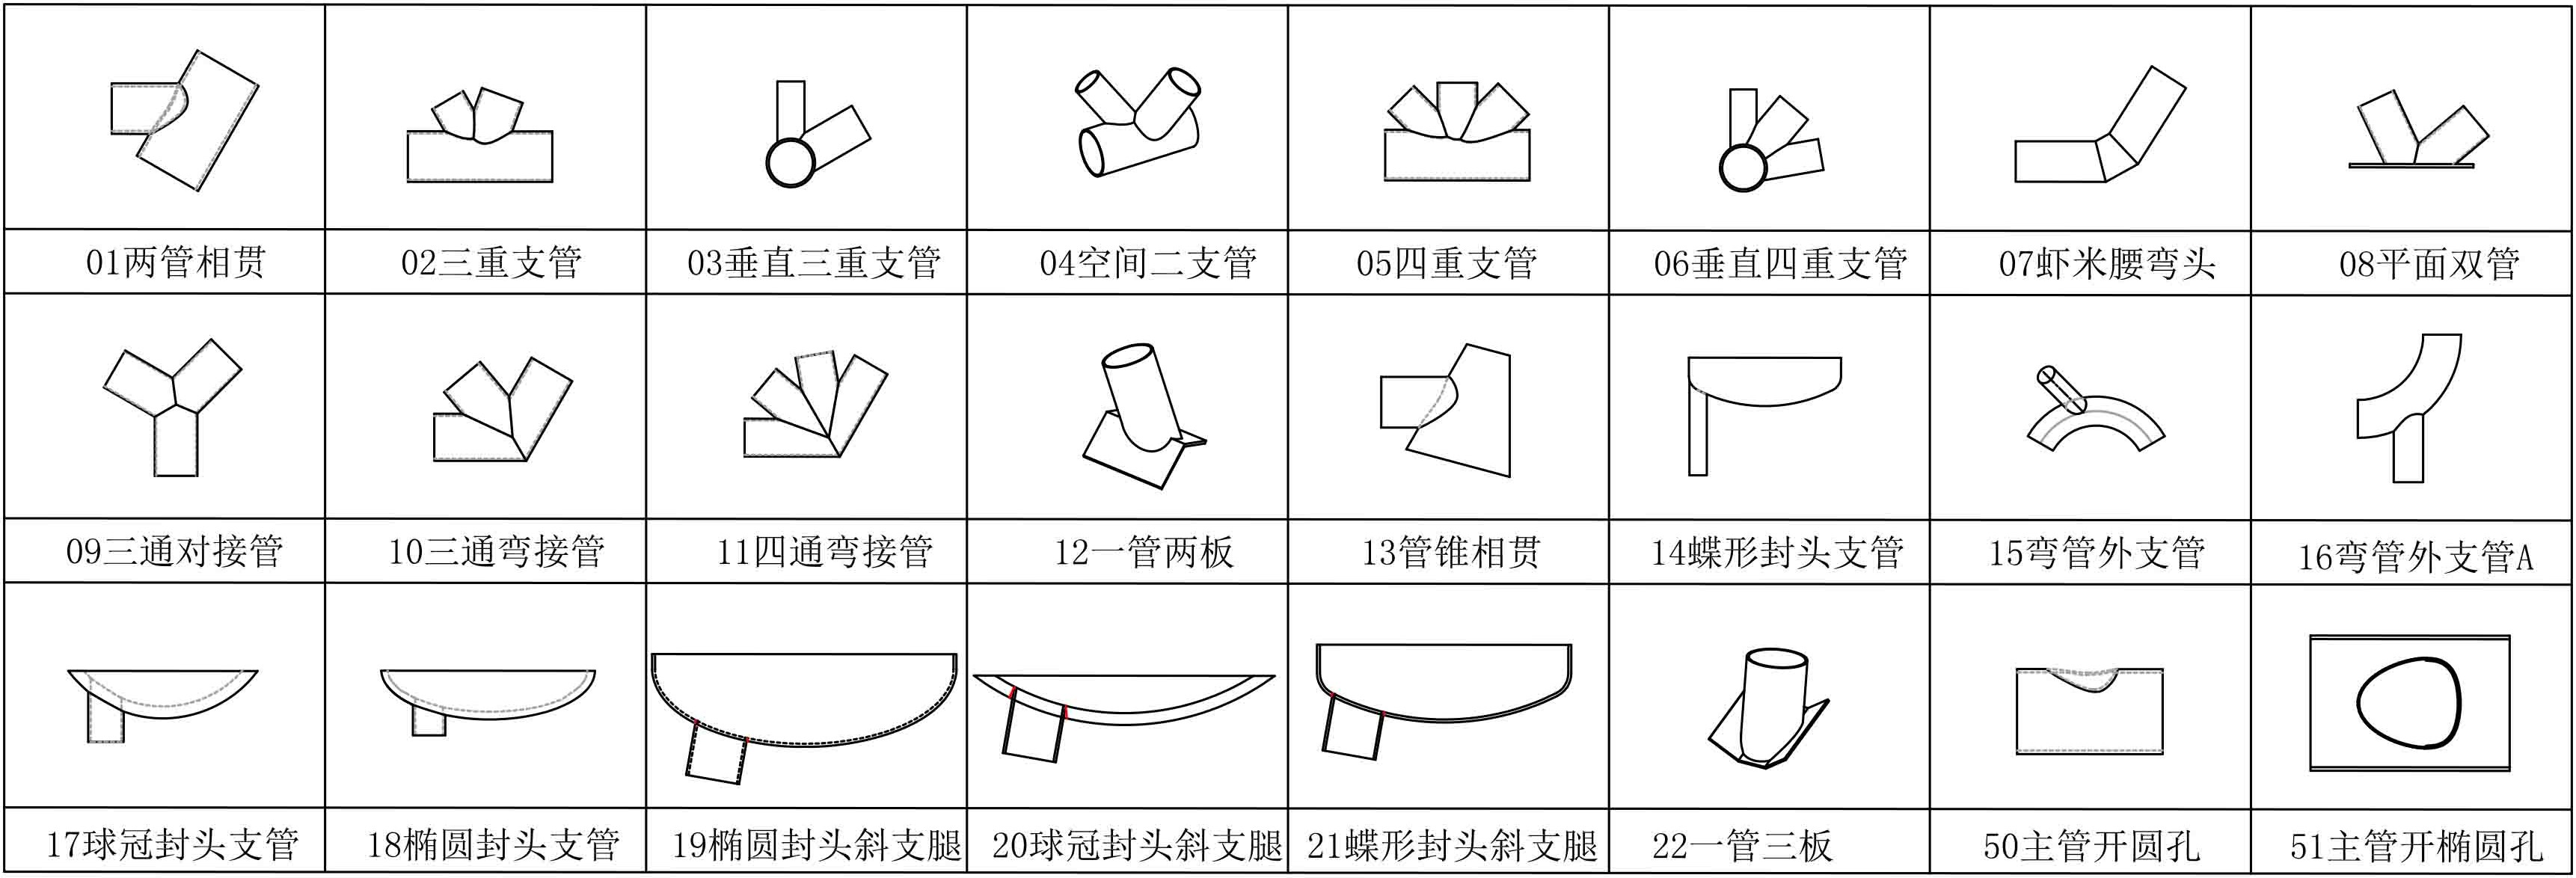
便携式相贯线切割机http://www.hycsk.com/product-59.html
数控相贯线切割机http://www.hycsk.com/category-12.html
相贯线切割机切割的展开图样线的基本方法 The basic method for cutting expanded pattern lines with intersecting line cutting machine
相贯线切割机切割的展开图样线的基本方法及辅助平面法,可以准确的把切割路线画出来。可以引导割枪切割路线。下面具体介绍一下这个问题,广大用户也都很关注 。
2.图解法,它运用投影原理作图,进行展开放样。首先按投影原理绘制出构件的有关视图,并画出辅助线,求出实长、实形等,然后再作出相贯线的展开图样线。图解法作图繁琐,手工作图误差较大,影响加工质量。计算机辅助绘图虽可提高精度,但是模块化程度不高,不易于程序设计。
1.计算法,它通过理论计算,进行展开放样。首先示意性的画出必要的视图,然后将圆管断面等分,将圆周上等分点折算成角度依次计算,再根据计算结果描点进行放样,作出相贯线的展开图样线。计算法作图迅速,虽然是近似计算,但等分点愈多展开图愈准确,足以满足工程需要。计算法繁琐的计算过程因其模块化程度高,可以通过程序设计来实现,精确的描点绘图也可由计算机来完成,可以确保产品质量,提高工作效率。本文讨论的就是如何通过计算法进行展开放样。 The basic method and the auxiliary plane method of the intersecting line cutting machine can draw the cutting route accurately. It can guide the cutting route of the cutting gun. Below the source of machinery specific introduction to this problem, the majority of users are also very concerned. 1. Calculation method, which expands and lofts through theoretical calculation. First, draw the necessary view schematically, then divide the section of the pipe into equal parts, convert the equal points of the circumference into angles and calculate them in turn, then draw the lofting points according to the calculation results, and make the expansion pattern line of the intersecting line. Although it is an approximate calculation, the more equilateral points, the more accurate the drawing is, which is enough to meet the engineering needs. Due to its high degree of modularization, the complicated calculation process of calculation method can be realized through program design, and the precise point drawing can also be completed by the computer, which can ensure product quality and improve work efficiency. This paper discusses how to expand and lofting by calculation.
相贯线切割机切割用辅助平面求相贯线的步骤:
1、形体分析参与相交的是哪两个回转体。所示的为轴线垂直相交的两圆柱体参与相贯。
2、分析相贯线的三面投影。所示,两相贯的圆柱其相贯线的水平投影积聚为小圆周、侧面投影夹在小圆周中的那段大圆弧线上。
3、求相贯线上的特殊点。俯视可知相贯线上的最前、最后点1、2;最左和最右点3点和4点。
4、四个特殊点的侧面投影;它们的正面投影如图所。
5、用辅助平面法求一系列中间点。辅助平面与两回转体相交的交线的交点是辅助平面、两回转面的三面的公共点。辅助平面的选择原则就是平面与两回转体同时相交的交线为最简单的直线或圆。因为直线或圆可以用圆规或直尺直接准确画出。所示,可选择正平面为辅助平面,它与两圆柱同时相交的交线都为直素线。
6、所示的是在最前与最后点之间取一正平面,它们与两圆柱交线的正面投影所示。四条交线的交点即为辅助平面、两圆柱面的公共点所示。 2. Graphic method, which USES the projection principle to draw a diagram and expand and lofting. First, according to the projection principle, the relevant views of the component are drawn, and the auxiliary lines are drawn to find out the real length, the real shape, etc., and then the expansion pattern line of the intersecting line is made. Graphic drawing is tedious, manual drawing error is large, affecting the quality of processing. Computer aided graphics can improve the accuracy, but the degree of modularization is not high, not easy to program design. Intersecting line cutting machine cutting with the auxiliary plane intersecting line steps: 1, the body analysis involved in the intersection of which two rotating bodies. Shown are two cylinders whose axes intersect vertically. 2. Analyze the projection on three sides of intersecting line. As shown, the horizontal projection of the intersecting line of two intersecting cylinders accumulates into a small circumference, and the lateral projection is sandwiched on the great circular arc in the small circumference. 3. Find special points on the intersecting line. Looking down, we can see the first and last points 1 and 2 on the intersecting line. Leftmost and rightmost points 3 and 4. 4. Side projection of four special points; Their front projection is shown here. 5. Use the auxiliary plane method to find a series of intermediate points. The intersection of the auxiliary plane and the intersection line of the two rotating bodies is the common point of the auxiliary plane and the three sides of the two rotating planes. The selection principle of the auxiliary plane is that the intersection line between the plane and the two rotating bodies is the simplest line or circle. Because straight lines or circles can be drawn directly and accurately with a compass or ruler. As shown, the positive plane can be selected as the auxiliary plane, and the intersecting lines of the two cylinders are all straight prime lines. 6. What is shown is a positive plane between the most front and the last point, and the positive projection of the intersection line between them and the two cylinders is shown. The intersection point of four intersecting lines is the common point of the auxiliary plane and the two cylinders.
相贯线切割机切割效果: Cutting effect of intersecting line cutting machine:


